
How To Set Up Pretty Much Any E-Bike
August 23, 2022
So you have purchased a new e-bike and are excited to get out onto the roads and trials with it. But wait! There are no instructions or setup points for you to follow! While this might all be simple advice if you follow along with this guide you should be able to set-up pretty much any e-bike no matter what make or model you purchased…
1. Open box

Open the top of the box by carefully cutting through the adhesive strips and removing the staples.
Danger! Never cut open the box with a knife as you could be damaging the paperwork or cutting the top of the frame and that would not be a good start at all.
2. Take Everything Out
The best way to set up and start assembling just about anything is to make sure you have all the parts you need first. Simple get everything out of the box and rested onto the ground. You might want to put down a large peice of cardboard first to rest the e-bikes forks upon as they to can become scratched and damaged on hard concrete surfaces.
3. Remove Any and All Transport Packaging

The next step is to remove the transport protection with scissors or a knife and unpack handlebars carefully as the rubber grips are easily cut with knives. You will often find you will need scissors and possibly a pair of cutting pliers.
4. Unscrew The Stem

The best way to start the main assembly is with the handlebars. Simply open the stem with a size 5 Allen key (most of the time anyway) to remove the handlebar clamp. All four screws and the handlebar clamp must be removed completely.
5. Install the Handlebars

Put on the handlebar clamp and tighten all four screws evenly but not too tightly so you can then adjust the pitch and position of the bars to your preferences.
5. Mount The Pedals

Each pedal has a small mark ( L and R ). This indicates on which side of the bike the pedal must be mounted. Danger! Never mix up the left and right pedals as this could damage their threads making both pedals defective. Do check out one of our unboxing videos if your pedals don’t show those letters.
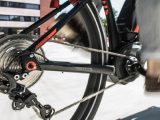
6. Install Wheel/Wheels

When it comes to installing the wheel (often only one is detached) you will need to find the quick-release skewer. Simple make sure the disc brake wheel is aligned with the disc brakes (if you have them) and insert the wheel. Once it is in the main housing of the forks you can then insert the quick-release skewer.
6. Pump Up The Tyres
The correct tire pressure can often be found in the operating instructions or if not the tyre itself. Most tyres will have a max pressure on them so take this as the most it should be, not a target to reach. The easiest way to get the right tyre pressure is to do so by hand pump it up and bit and push down on the tyres until you are at a level of hardness you are comfortable with. Being a heavier man I often pump mine to 75% of max and I find this is often the best pressure.
7. The Test Drive
The only thing left to do now is to take a test drive. Please note the operating instructions Important! Read the user manual carefully before using your bike for the first time. Pay particular attention to the instructions on maintenance and care of the bike.
The best place to test an e-bike is to do so on a straight, flat ride. If you test it going downhill the power-push might scare you and make the e-bike uncontrollable and if you test it going uphill straight away you might be left feeling disappointed with the amount of power it delivers. It’s a question of getting used to your e-bike and getting used to the power it delivers.
If you have any other questions about setting up your e-bike or you are thinking of buying one and have a few other questions do get in touch with us via the contact page.